
The idea and vision to build an outdoor kitchen started in 2013 because we wanted to prep vegetables and can fruit outside. After removing a non-functioning hot tub and a wobbly deck, the area was perfect for the kitchen.
After the hot tub and deck were removed, the space was now clear to design the outdoor kitchen. The location of the beams for the counter and roof supports were laid out using 6×6 lumber left over from the Compost Manure Bunker. The beams milled to be very large because we want to support a Green Roof. The design I created also did not include any metal brackets or vertical brackets to support the beams.
The area was spray painted to determine the size and location of a pathway between the Cordwood Studio and Brick Patio. A sketch was made and lumber ordered from miller Jason Vincent.


In August 2013, our contractor Ian built the framework for the cement pad. We knew we wanted the pad larger and higher than what was already in place.
Base gravel was then added, and deep holes were dug to cement in the redwood posts. In order to avoid using metal brackets for the posts, the beams were cemented in before pouring the cement pad.
Also, the location of the sink was determined so that the pipes for water and drainage could be added. Water is coming from the sprinklers which we don’t use anymore since we removed all the grass. Drainage for the sink will go into the landscaping as grey water.
The beams were cemented in the holes. The beams were sized so that the front row was shorter than the back row to allow for a slanted roof.
After the beams were in place, Jason Vincent suggested we cut down the Douglas Fir tree in front of the house. We were planning on removing the tree eventually because it was split at the top and a danger to the house. Before adding the roof to the kitchen, Jason thought the tree should be removed in advance.
The next step in the project was to get the cement pad poured. In the meantime, we are working on the hardscaping, and a new path has been added.

November, 2015
In October, 2016 (3 years after the frame was built), cement was poured by Eric Hammer Construction.
At the end of December, 2016, river rocks were added around the cement pad to walk in and out of the kitchen.


On January 6, 2017 Jordan Booth welded three floating shelves for one of the 6×6 redwood beams. Please read the Blog Post: Floating Metal Shelves to learn more about the design and process. Now, the roof can be started!


To prepare for the roof, Rick and Rich brought over an ATV to tow two large 6x8x16 beams that had been stored in the front yard for many years. Because they were much too heavy to carry, their ATV rig was the perfect solution to drag the beams to the kitchen location.

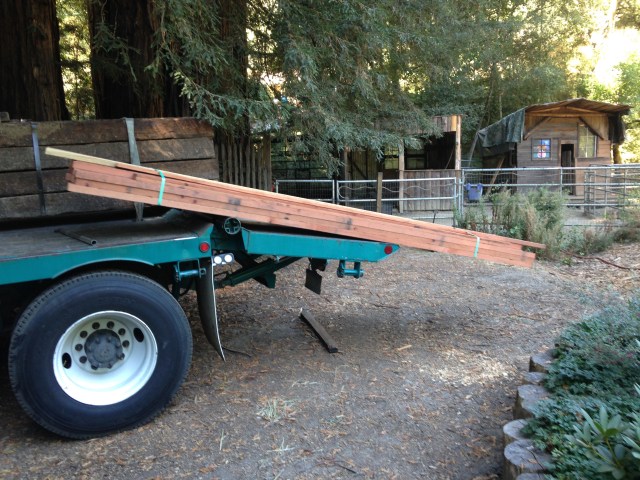
On Friday, March 10, 2017 a 6x8x16 foot redwood beam was custom milled and delivered by Dave Merchant of Out of the Woods Mill http://outofthewoodsmill.com/services/ I needed a third beam for the roof and was so fortunate to find this miller.

I originally wanted a heavy-duty beam (6×8) because I was going to do a “green” roof. We changed plans and settled for a traditional roof with green composite roofing to match the house.
On Monday, April 3, 2017, Rich Wilhelmsson and his friend Tarek spent the day installing the three beams. The goal for 2017 was to get roof and lights added.
One month at a time, the roof was completed. I decided to buy AC plywood sheets at San Lorenzo Lumber so that I would have a nice finish on the ceiling face. I stained the plywood with a redwood colored stain.

Years prior, I had purchased 2×6 redwood from Jason Vincent with the intention of using the lumber for the kitchen cabinet framework. However, they were perfect to use for the framing on the roof. It took a little bit of elbow grease to clean the mud off them first. The roof beams and plywood were installed by Rich in June, 2017. On the same day, work started on the lights.
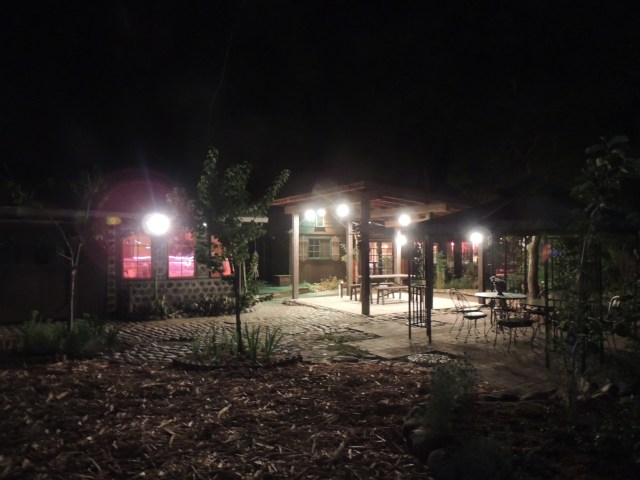
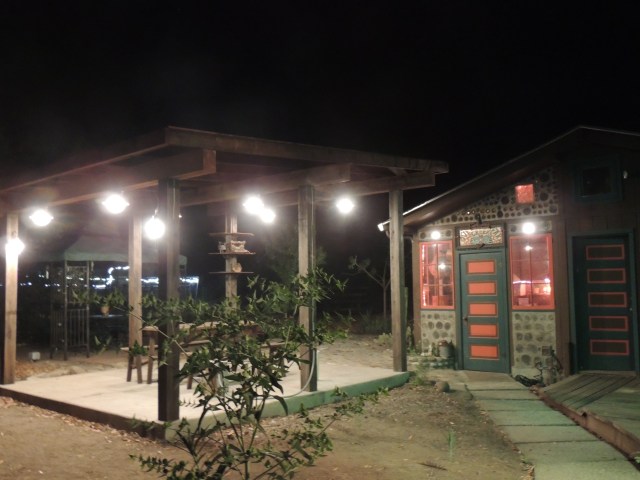
The lights were installed in June by Jeff Sheets of Electric Electric. The switches and outlets will be added once the cabinets are built in a year or two.
Next, in October, Rich and Rick installed the green composite roofing purchased from ABC Roofing in Santa Cruz.
August 2017
In January 2018 we had a gutter and downspout installed by AR Gutters & Sheet Metal Inc.


The water running off the roof as well as water draining from the sink flows into a water retention pond – rain garden in the front yard – dRain Garden.
On Friday, July 20, 2018 Rich came over to take measurements for the cabinets and created a lumber list for milling. So exciting to actually get started with the cabinets!
The plan was to get the redwood milled by David Merchant who had delivered the roof beam. However, at the last minute, he said he couldn’t do it so I rushed to order through Big Creek Lumber. On September 15, 2018 Big Creek Lumber delivered the redwood for the cabinets. I had also picked up shiplap (aka V-Rustic) from Scarborough Lumber in Scotts Valley for the cabinet doors. Rich took this material home to build the cabinet doors and kept them stored for a few months while work continued.
 From Monday, September 15 – Wednesday, September 17, 2018, the cabinets were built using redwood and plywood. The sink, stove, and refrigerator are all materials purchased used from craigslist. The pull out drawers were given to us by my parents who remodeled their kitchen.
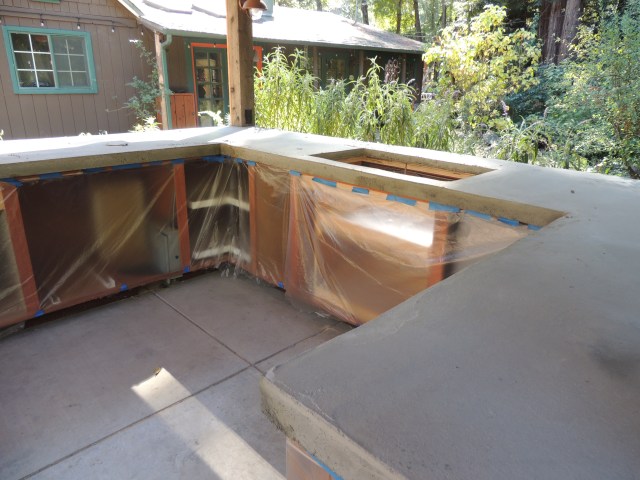
The next step was to add plywood and cement board to build up and sturdy the cabinets for the cement countertops. I really wanted to use cement, and I asked John Finney who had built a cement countertop before.
In October and November, the cement countertops were built. Once mixed and smoothed, the cement had to cure for about 30 days. Then, it took John another month off and on to wet sand. It was super difficult to find the Quikrete Countertop mix, but it worked out perfectly as one store had it in the Central Valley, and John just happened to be helping a friend with setting up a solar system in the same area. He picked up a pallet with his trailer.
The cement countertops turned out great. The only negative was that the wet sanding stained the fresh redwood lumber. We were smart not to put the doors on yet.
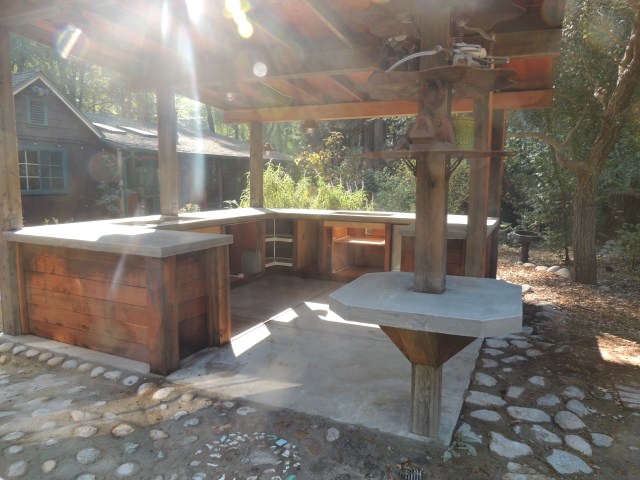
After finishing the cement, there was one stand-alone post with 3 metal floating shelves. People kept hitting their heads on the bottom shelf. To resolve the problem, we added a shorter little table which I call the coffee bar.
Over the Thanksgiving holiday, my friend Chris and I acid stained the countertops. I had ordered 4 colors (Shifting Sand, Cola, Coffee Brown, and English Red) of concrete acid stain through Direct Colors after much research and photo viewing.

We sprayed and brushed on the stain, not really knowing what to expect. The color didn’t dry within the 4-6 time recommendation, so I left it on all night.
The stain didn’t turn out as bright as I had hoped, probably because the concrete was more grey in color rather than white. Overall, the colors are perfect; rust colored and evenly coated.
At the end of 2018, Travis Martin Pluming hooked up the sink. I had just assumed from the very beginning before the cement pad was even poured, that the water for the sink could come from the sprinklers. Turns out that Travis hooked into a different water line. They did a great job, and it’s fantastic to have an outdoor sink.
Now, the cabinet doors that Rich built at home from the shiplap could be installed. All forms of water, acid, or ways to ruin the beautiful redwood were over! Feels like the finale – six years in the making!
Work continued in 2019. I was waiting and waiting for 60 degree weather to roll on a protective countertop sealer. Around April, I finally got that done once it stopped raining. The sealer really brightened up the color.
As of August, 2019, there are still a few more items to finish up. The propane stove has to be taken in to convert it from natural gas to propane. Next is adding one shelf in the cabinets, and trim pieces around the 6×6 posts to cover a small gap between the cement and posts, purposely designed for expansion.
