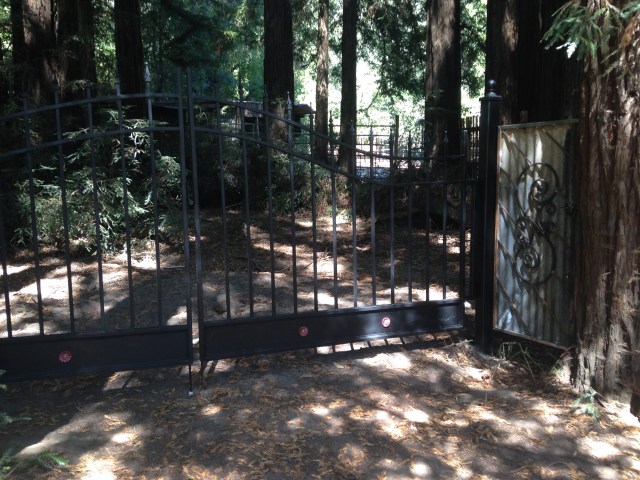
It’s exciting that the fencing around the Cathedral Redwood Grove is finished. We started on the Redwood Grove Bark Fence back in November 2018. Now, these recycled iron gates are the entrance into the grove. Plus, I have a new, custom made walk-in gate.
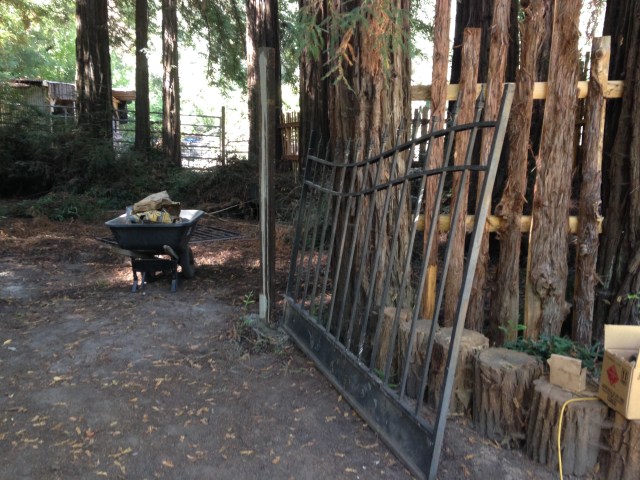
I found these custom designed iron gates on craigslist for $150 and picked them up on New Years Day, 2017.
 We always knew they’d go in the redwood grove to highlight the entrance as something more fancy than wire supported with t-stakes. To get the process started, I bought 10′ metal posts from PD Steel over the Christmas holiday, weld-on hinges, ball caps, and black primer.
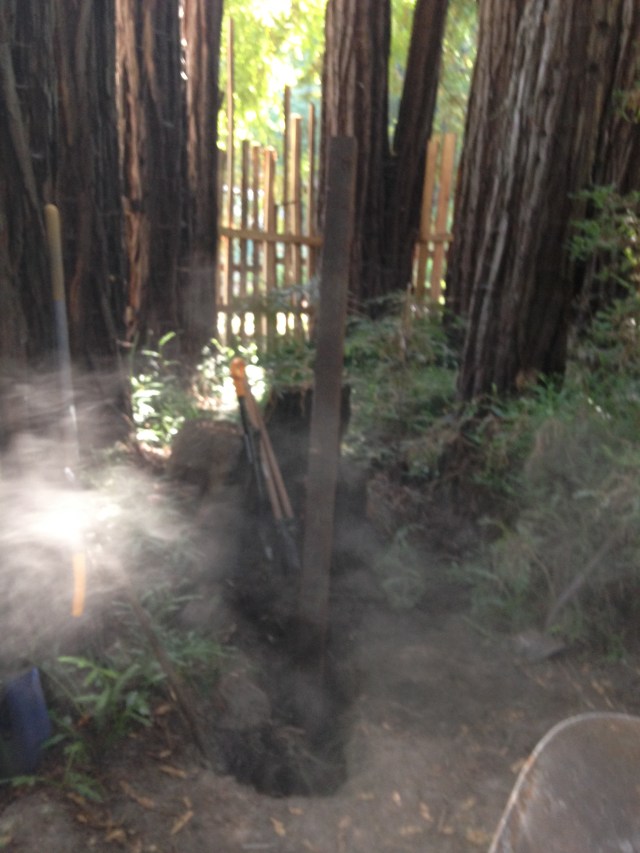
We dug the 3′ holes in spring, but the holes would fill with water. It was difficult to dig because of the mud and not really being able to determine the bottom which would just fill back in with mud. The redwood roots hold water. In the summer, Will and I cemented in the first post. We had dug the second hole, but Mike did not want to cement in the second post for fear that the measurements would be wrong. Good thing!
On Friday, August 16, welder Jordan Booth came over to get a sense of the gate measurements and help us with the second post. He had quickly eyed the gates back in 2017 when he was working on another project for us, and I thought he said leave a 2″ gap between each post and the center (so 6″ total). Over the phone, he said, no leave a 1″ gap. When he measured and saw the gates, he said that they were designed and built for a sloped driveway, that they are not even. Oh, I knew that when I went to get them in Los Gatos, the house was down a sloped driveway. He said we had to move the 3′ post hole over to accommodate for some modifications he needs to make on the gates. This is exactly why we knew not to cement in the second post. There are too many things that could go wrong until the expert is present!

Farmhand Will Burke got busy digging out the second hole and cutting through big roots with a Sawsall. In the meantime, Jordan filled the first post with cement to sturdy it and give structure for welding on the hinges.

The guys mixed a lot of cement. We also had to fill the wrong hole with cement and chunks of cement, rock, and bricks to give structure and support for the post.


On Monday, August 19, Jordan returned to modify the gates for more structural support and weld them on.
He removed the original hinges with a grinder.


Then, he set up the gate, measured the gap and made extensions on either end to strengthen the area where the hinges would be attached.
Deciding how high to raise the gates and welding them on.
The gates really look nice on the redwood grove.


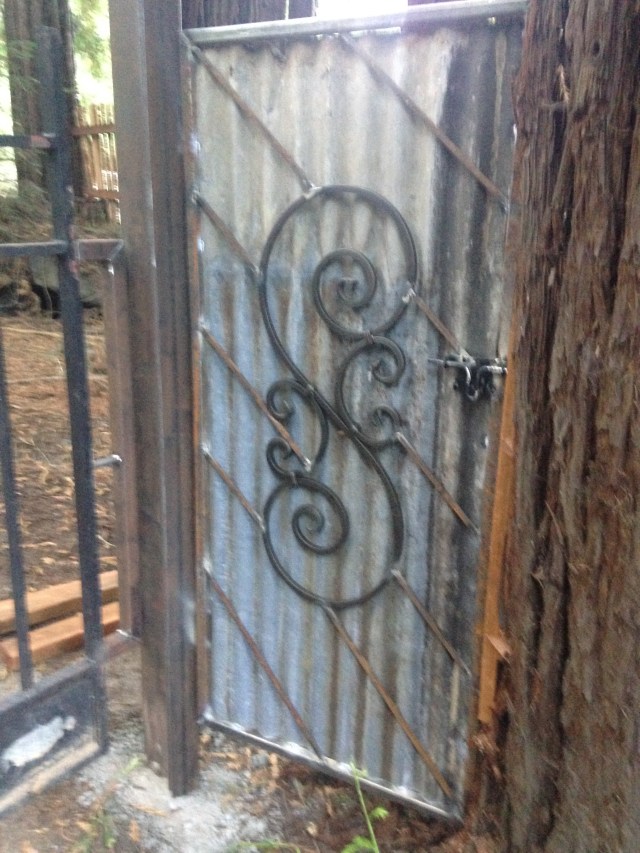
The location of the first post caused the gates to be off-center. But, they had to be set back a few feet from the tree due to roots and burl. Jordan commented that it would be perfect for a “pedestrian” gate. He wanted to design a gate, and I was excited to have something custom made.

The gate was installed on Wednesday, August 21, really fast turn around time. It looks great, perfect rustic style for the farm. Jordan said it’ll rust up in about 6 months, and he even removed some of the black paint off the new, shiny latch so it would have the same patina.
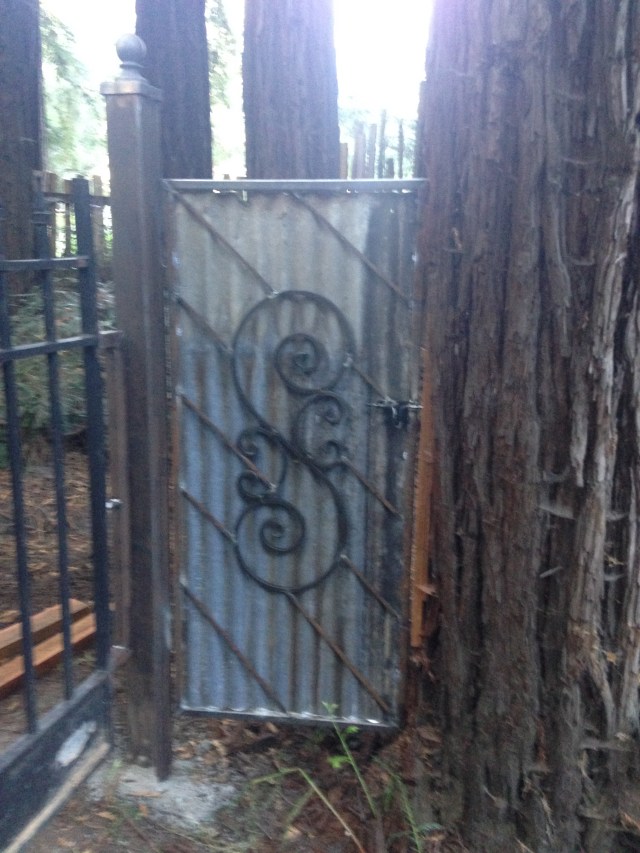
I need to clean the black gates with acetone, brush off the peeling paint, then clean again, and finally spray paint with black primer.
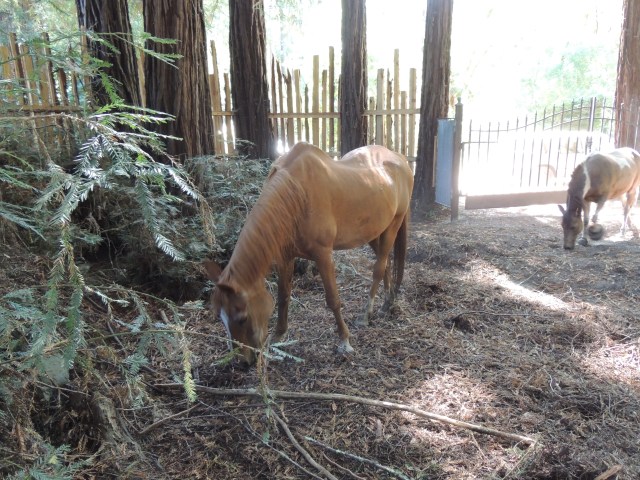
The horses now get to relax, play, and eat twigs inside the secured redwood grove!

Sunday, September 8: the gates got a touch of flower power. They were cleaned and painted.